Protocol:
Protocol for the Removal of Alvetex® Discs from 6 well or 12 Well Inserts by Unclipping the Well Insert Base
● Download this protocol as a PDF (2.4 MB)
Note: This technique works with both wet and dry Alvetex membranes and works with both Alvetex 6-well inserts (AVP004) and 12-well inserts (AVP005).
1. Equipment
- A sterile surface on which to stand the well insert — if aseptic technique is required. A new Petri dish or lid is ideal.
- A Nuffield spatula (see Figure 1). Alternative types of spatula/device also work: i.e. any piece of (sterilizable) metal or plastic with a curved profile, that is thin enough to unclip the well insert base hooks (see Procedure, step 3).

Figure 1. A Nuffield type spatula
- Tweezers — preferably with blunt, smooth gripper-pads — for handling the Alvetex membrane.
- 70% ethanol — for sterilization of the spatula and tweezers (and the support surface).
- Microbiological safety cabinet — if aseptic technique is required.
- Personal protective equipment — lab coat, gloves, etc.
2. Procedure
- Place the well insert on a clean, sterile surface.
- Hold the well insert by placing two fingers under two wings (see Figure 2).
- Hold the spatula backwards with its underside toward the Alvetex well insert. With the spatula at an angle approximately 45° place the spatula into the well insert window so that the tip of the spatula can press behind the well insert base hook (see Figures 3 and 4)
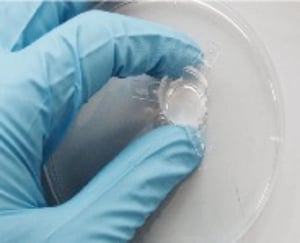
Figure 2. Holding a well insert on a sterile surface.
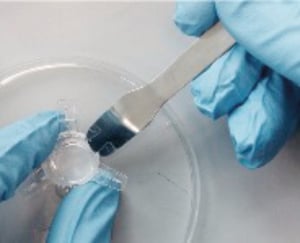
Figure 3. Pressing the spatula tip behind the well insert base hook.
Note: in the Figure 3 photo, the plastic sides of the well insert window can be seen reflected in the shiny metal spatula underside.
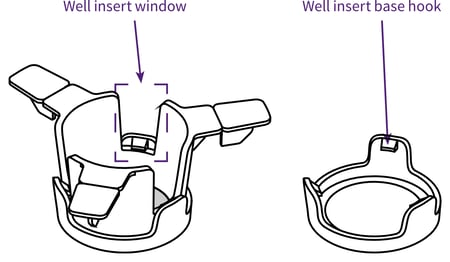
Figure 4. Drawing of a 12 well insert (AVP004) showing the location of a well insert window and a well insert base hook.
- While pressing down behind the hook with the spatula, use the fingers of your other hand to carefully lift the well insert upper part (see Figure 5).
- Meanwhile, bring the spatula to a vertical position so that its tip releases the hook on the well insert base.
- The well insert base may now have become completely detached from the well insert upper part.
- If the well insert base is still partially attached, then rotate the insert and perform steps 2-5 for un-hooking the base at another window.
- The Alvetex membrane can then be easily lifted out of the well insert base using tweezers (see Figure 6).
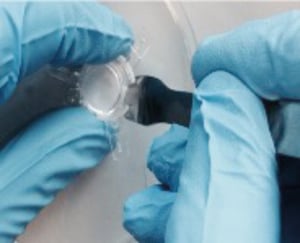
Figure 5. Un-hooking the well insert base.
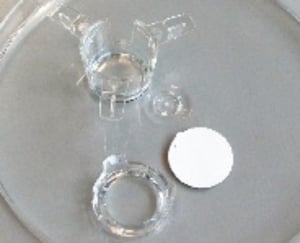
Figure 6. Alvetex membrane removed.